Stage 4: KillBrick Path + dropper
Finish Stage 3. Your TycoonEconomy script has a wirePickup function and a scanner that wires every pre-placed pickup in Workspace.
a KillBrick path, the Stage 5 checkpoint, a hazard script that kills on touch, and a Dropper that spawns a fresh pickup every 3 seconds
how Instance.new builds parts at runtime, and how a Debris service prevents your world from filling up with stale coins
a small coin machine that constantly trickles new pickup coins onto the floor — passive income while you're climbing
90-second demo:
- Play Stage 4. Stand near the Start Platform coin machine. Wait 3 seconds. A gold coin pops into existence near a small spout.
- Wait 6 more — two more coins appear. Collect them with E.
- Walk the obby to Stage 5 (don't touch any KillBricks). Counter goes up by 5 at the new pad.
- Explain: "Tycoons earn while the player plays. Even when you're climbing, your coin machine is making money. That's the dropper's job."
The big idea
So far every coin in your obby was placed by hand or scattered in advance. Today you build the first production line — a Dropper part that creates new pickups at runtime, on a timer. Once you press Play, the dropper runs forever, spawning coins for the player to collect even while they're elsewhere in the obby.
This is the tycoon mechanic at its core: passive income. The player doesn't have to do anything to earn from the dropper. They just have to come back and collect. That's why tycoon games are addictive — the moment-to-moment loop is "go climb, come back, collect, repeat."
The dropper script uses Instance.new — the same Lua function you saw briefly in Stage 5 of the base obby (fireballs) and Stage 7 (boulders). Same recipe: create a part in code, give it a shape and color, set its position, parent it to Workspace. The difference today is the dropped thing has a ProximityPrompt and a CoinValue attribute — same pattern as Stage 3's hand-placed pickups. The Stage 3 script's wirePickup function picks them up automatically.
You'll also add the KillBrick path as the obstacle for Stage 5 — that part is familiar from the base obby.
- Instance.new
- Lua function that creates a new Roblox object (a Part, Sound, Script, anything) in code
- Debris service
- a Roblox helper that auto-destroys a part after N seconds — used to clean up dropped coins that never got picked up
- task.wait
- the modern Roblox way to pause a script for N seconds (preferred over the older `wait()`)
- passive income
- money the player earns without active effort — in tycoons, this comes from droppers, factories, and timers
- CFrame.Angles
- a way to express rotation in 3D space; used here to lay the cylinder coin flat
Build it
Step 1 — Build the KillBrick path
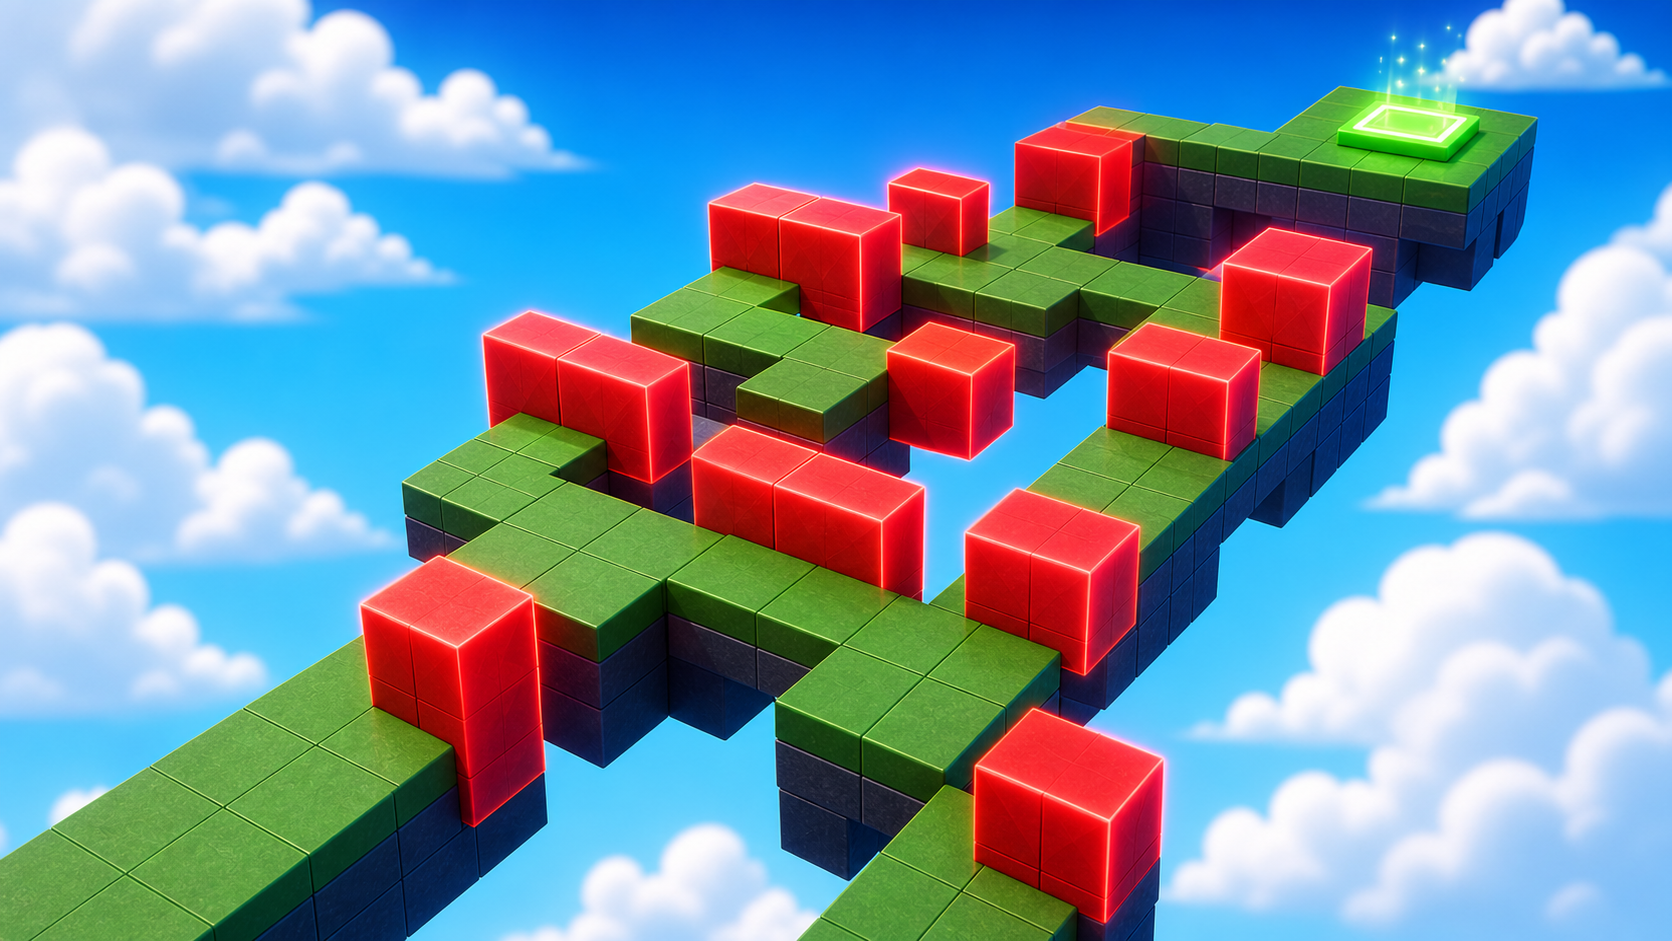
Wide path with three red hazards. The hazards kill on touch using the same Touched-event pattern you've seen in Makers Stage 4.
Build this partHazardPath
BlockOpen recipe
HazardPath
Block- Size
- 10 × 1 × 30
- Color
- Dark stone grey
- Material
- Concrete
- Anchored
- ✓ Yes
- Place
- In front of the Stage 4 yellow pad, stretching forward 30 studs
Build this partKillBrick_1
BlockOpen recipe
KillBrick_1
Block- Size
- 4 × 4 × 4
- Color
- Really red
- Material
- Neon
- Anchored
- ✓ Yes
- Place
- On HazardPath, off-center
1.1 Add the kill script
Right-click KillBrick_1 → Insert Object → Script. Open the editor. Replace the placeholder with:
local brick = script.Parent

brick.Touched:Connect(function(otherPart)
  local character = otherPart.Parent
  local humanoid = character:FindFirstChildOfClass("Humanoid")
  if humanoid then
    humanoid.Health = 0
  end
end)
This is the same kill pattern from Makers Stage 4 — Touched fires, find a Humanoid, set Health to 0.
1.2 Duplicate the KillBrick
- Click KillBrick_1 in Explorer. Press Ctrl+D twice. You'll have KillBrick_2 and KillBrick_3.
- Drag the duplicates to different spots on the path.
- The duplicates already include the Script (Ctrl+D copies children), so they all kill on touch.
Step 2 — Wire the Stage 5 checkpoint
Build this partSpawnLocation (Stage 5 — end of hazard path)
BlockOpen recipe
SpawnLocation (Stage 5 — end of hazard path)
Block- Size
- 6 × 1 × 6
- Color
- Bright violet
- Material
- Plastic
- Anchored
- ✓ Yes
- Place
- At the end of HazardPath
Also: check AllowTeamChangeOnTouch. Uncheck Neutral. Set TeamColor to Bright violet.
Tag this SpawnLocation with a StageNumber attribute set to 5.
In Teams, insert a new Team named Stage 5. Set its TeamColor to Bright violet. Uncheck AutoAssignable.
Press Play. Walk the hazard path carefully (touch a KillBrick and you respawn at the Stage 4 yellow pad — the previous checkpoint). Reach the violet pad. Counter goes up by 5.
Step 3 — Build the dropper
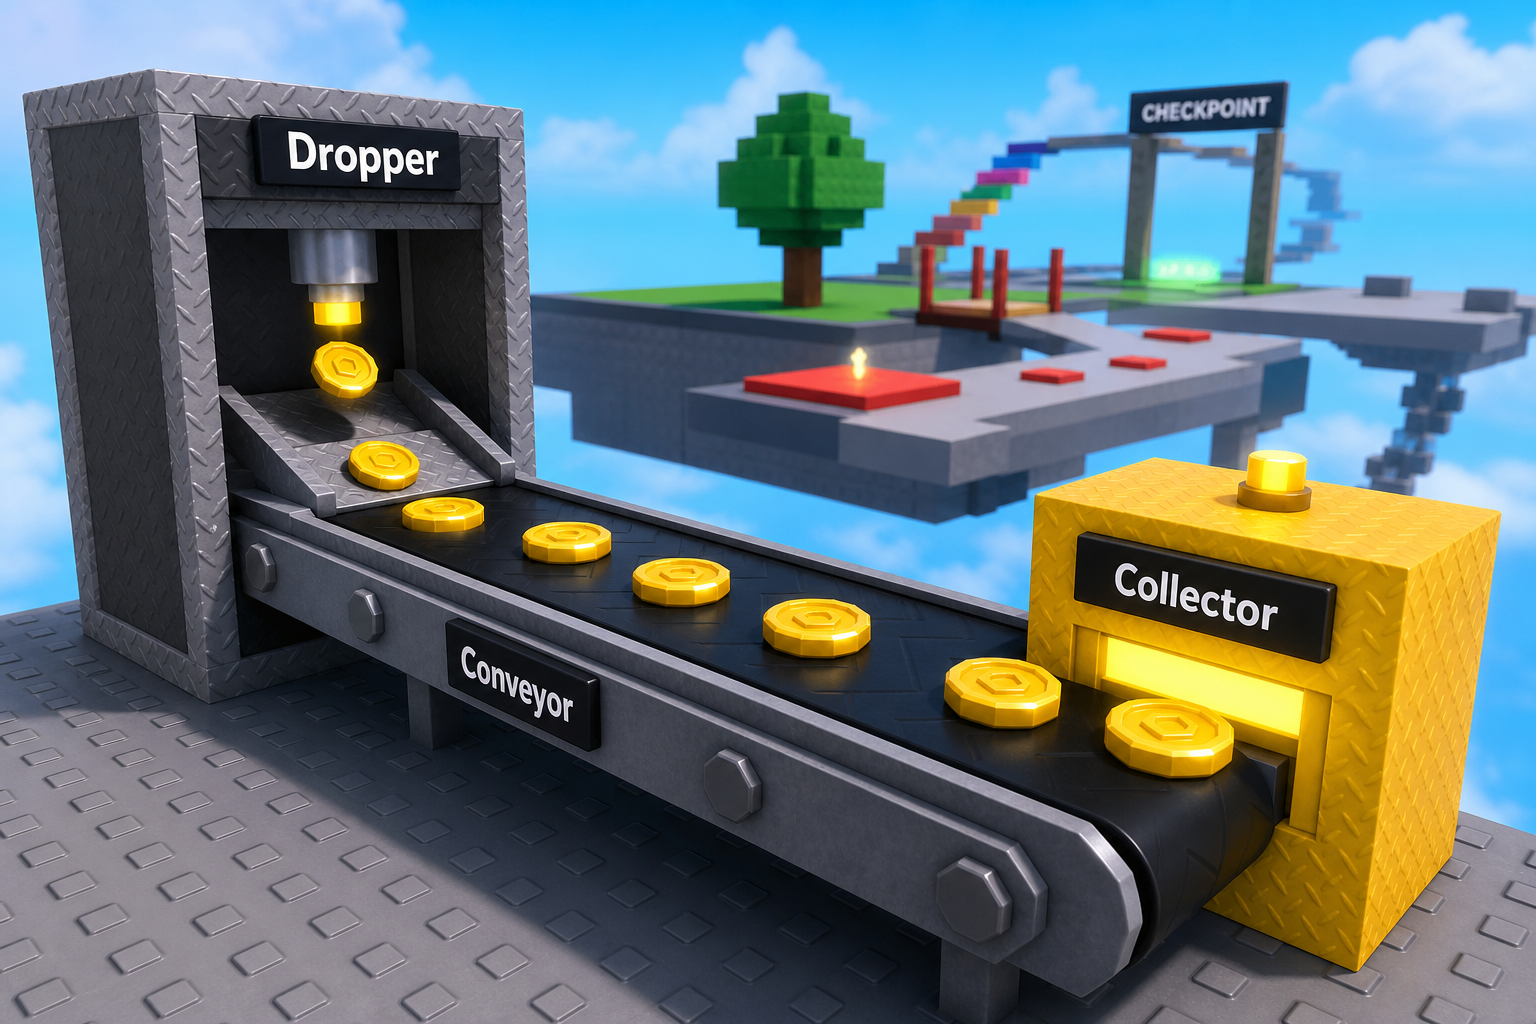
The dropper is a small part near the Start Platform that spawns new coin pickups on a timer.
Build this partDropper
CylinderOpen recipe
Dropper
Cylinder- Size
- 2 × 1.5 × 1.5
- Color
- Dark stone grey
- Material
- Metal
- Anchored
- ✓ Yes
- Place
- On the Start Platform (`Lobby` part), off to one side. Lay it flat (rotation X = 0, Y = 0, Z = 90) so it looks like a downward spout.
The spout shape is decorative — the script handles all spawning. But a recognizable dropper helps players understand WHERE the coins come from.
Step 4 — Wire the dropper script
The dropper script lives in ServerScriptService (server-authoritative — it's creating things that affect the player's coins). You'll build it in three passes — first confirm timing works, then make a visible coin appear, then add the prompt + attribute + cleanup.
You need the wirePickup function from Stage 3 to be defined before this block uses it. Confirm Stage 3's script section is above where you're about to add Stage 4's code.
These three passes are the same dropper loop getting upgraded. Pass 1 is a timing test. Pass 2 replaces the print("Drop!") test with a visible coin. Pass 3 keeps that same loop and adds the missing coin-system pieces. Do not keep multiple dropper loops.
Pass 1 — task.spawn + a loop that prints every 3 seconds
Type this to the bottom of TycoonEconomy:
local DROP_INTERVAL = 3

task.spawn(function()
  while true do
    task.wait(DROP_INTERVAL)
    print("Drop!")
  end
end)
Press ▶ Play. Within 3 seconds, Output prints Drop!. Every 3 more seconds, another Drop!. The timing is correct.
The task.spawn is what lets the loop run alongside everything else. Without it, the while true do would freeze the rest of the script — Stage 2's SpawnLocation handlers would stop firing. Press Stop.
Pass 2 — Replace the print with a visible coin part
Add local dropper = workspace:WaitForChild("Dropper") above the task.spawn. Then replace only the print("Drop!") line inside the loop with code that creates a part and parents it to Workspace:
local DROP_INTERVAL = 3
local dropper = workspace:WaitForChild("Dropper")

task.spawn(function()
  while true do
    task.wait(DROP_INTERVAL)

    local coin = Instance.new("Part")
    coin.Name = "DroppedCoin"
    coin.Shape = Enum.PartType.Cylinder
    coin.Size = Vector3.new(0.4, 1.5, 1.5)
    coin.Color = Color3.fromRGB(255, 215, 0)
    coin.Material = Enum.Material.Neon
    coin.CFrame = dropper.CFrame * CFrame.new(0, -2, 0) * CFrame.Angles(0, 0, math.rad(90))
    coin.Anchored = true
    coin.Parent = workspace
  end
end)
Press ▶ Play. Within 3 seconds, a gold disc appears just below the Dropper. Within 6, another. Within 9, three. They just sit there — no prompt, no payout. Pass 3 adds those.
Expand Workspace in Explorer while playing. You'll watch DroppedCoin entries pop into existence in real time. That's Instance.new at work — the script is creating new parts.
Press Stop.
Pass 3 — Add the ProximityPrompt, CoinValue attribute, wirePickup call, and Debris cleanup
Add local Debris = game:GetService("Debris") at the top of your script (with the other game:GetService lines). Add two more constants near DROP_INTERVAL. Then update the same dropper loop so it matches this checkpoint:
local Debris = game:GetService("Debris")  -- type this near your other requires at the top

local DROP_INTERVAL = 3
local DROP_VALUE = 2
local COIN_LIFETIME = 30
local dropper = workspace:WaitForChild("Dropper")

task.spawn(function()
  while true do
    task.wait(DROP_INTERVAL)

    local coin = Instance.new("Part")
    coin.Name = "DroppedCoin"
    coin.Shape = Enum.PartType.Cylinder
    coin.Size = Vector3.new(0.4, 1.5, 1.5)
    coin.Color = Color3.fromRGB(255, 215, 0)
    coin.Material = Enum.Material.Neon
    coin.CFrame = dropper.CFrame * CFrame.new(0, -2, 0) * CFrame.Angles(0, 0, math.rad(90))
    coin.Anchored = true
    coin:SetAttribute("CoinValue", DROP_VALUE)

    local prompt = Instance.new("ProximityPrompt")
    prompt.ActionText = "Collect"
    prompt.HoldDuration = 0
    prompt.MaxActivationDistance = 8
    prompt.Parent = coin

    coin.Parent = workspace
    wirePickup(coin)

    Debris:AddItem(coin, COIN_LIFETIME)
  end
end)
At the end of Stage 4, there should be one dropper loop in TycoonEconomy, and it should call wirePickup(coin) after each spawned coin is parented to Workspace.
Press ▶ Play. A coin appears, with a "Collect" prompt above it. Walk near, press E — counter goes up by 2, coin destroys.
Walk away to climb the obby. The dropper keeps making coins. Come back — they're piled up waiting for you.
If you let a coin sit for 30 seconds without collecting, it auto-destroys (Debris's job). Without that, hundreds of uncollected coins would accumulate and Roblox would chug.
Understand it
The task.spawn(function() ... end) is a coroutine — a function that runs alongside the rest of the script. Without it, the while true do loop would block everything else (including the SpawnLocation Touched handlers). task.spawn says: "start this function in parallel and let the rest of the script keep running."
The Instance.new recipe is exactly the pattern from Stage 5 (fireball cannon) and Stage 7 (boulder spawner) of the base obby. Same five lines: create a Part, set its shape/size/color/material, position it, parent it to workspace. Today's recipe is slightly longer because you also add a ProximityPrompt and a CoinValue attribute — but the shape of the code is identical.
The CFrame.new(0, -2, 0) * CFrame.Angles(0, 0, math.rad(90)) is "two studs below the dropper, rotated 90 degrees around Z." CFrame multiplication lets you compose position + rotation in one expression. You don't have to master CFrames today — just notice that the dropped coin appears under the dropper and flat.
The Debris:AddItem(coin, 30) is the line that protects your server from coin pile-up. Without it, every uncollected coin would live forever — and a 30-minute play session could leave thousands of parts in Workspace. With it, each coin has a 30-second TTL: if nobody grabs it, Roblox auto-destroys it.
The call to wirePickup(coin) is the bridge to Stage 3's work. Stage 3's wirePickup function takes a part with a ProximityPrompt and a CoinValue and wires the Triggered handler. Today's spawned coins satisfy both conditions, so the same function handles them. No new collect-logic needed. That's the payoff of writing wirePickup as a function instead of inline code.
How this script makes a coin every 3 seconds, forever
A coroutine runs a forever-loop. Each tick of the loop builds one coin, drops it under the dropper, hands it to wirePickup so the player can collect it, and schedules a cleanup in 30 seconds.
local Debris = game:GetService("Debris")

local dropper = workspace:WaitForChild("Dropper")
local DROP_INTERVAL = 3
local DROP_VALUE = 2
local COIN_LIFETIME = 30

task.spawn(function()
  while true do
    task.wait(DROP_INTERVAL)

    local coin = Instance.new("Part")
    coin.Name = "DroppedCoin"
    coin.Shape = Enum.PartType.Cylinder
    coin.Size = Vector3.new(0.4, 1.5, 1.5)
    coin.Color = Color3.fromRGB(255, 215, 0)
    coin.Material = Enum.Material.Neon
    coin.CFrame = dropper.CFrame * CFrame.new(0, -2, 0) * CFrame.Angles(0, 0, math.rad(90))
    coin.Anchored = true
    coin:SetAttribute("CoinValue", DROP_VALUE)

    local prompt = Instance.new("ProximityPrompt")
    prompt.ActionText = "Collect"
    prompt.HoldDuration = 0
    prompt.MaxActivationDistance = 8
    prompt.Parent = coin

    coin.Parent = workspace
    wirePickup(coin)

    Debris:AddItem(coin, COIN_LIFETIME)
  end
end)
Line 1Grab the Debris service for cleanup.
Debris is the Roblox service that auto-removes a part after N seconds. Same service the base obby's Stage 5 uses to clean up fireballs.
Lines 3–6Tunable constants.
DROP_INTERVAL is how often a coin spawns. DROP_VALUE is what each one pays. COIN_LIFETIME is how long it survives if uncollected. Three knobs — change them to tune the dropper's feel without rewriting any logic.
Lines 8–10Run the loop in a coroutine so it doesn't block.
task.spawn lets the `while true do` run alongside the rest of the script. Without it, the SpawnLocation Touched handlers from earlier would never fire — the script would be stuck spinning in the drop loop.
Lines 12–19Build the coin part.
Same Instance.new recipe you've used for fireballs (base obby Stage 5) and boulders (Stage 7). The CFrame line positions the coin 2 studs below the dropper and lays it flat (90 degrees around Z).
Line 20Tag the part with its payout.
Same CoinValue attribute pattern as Stage 3's pickups. The single number on the part decides the payout — no payout logic baked into THIS script.
Lines 22–26Add a ProximityPrompt in code.
Same ProximityPrompt you added by hand in Stage 3 — just built with Instance.new this time. The settings (ActionText, HoldDuration, MaxActivationDistance) match what you set in Stage 3 so the pickup feels consistent.
Lines 28–29Drop the coin and wire it.
Parenting to workspace makes it visible in the game. wirePickup connects the Triggered event so pressing E pays the player and Destroys the coin.
Line 31Schedule cleanup in COIN_LIFETIME seconds.
If nobody collects this coin, Debris will Destroy it after 30 seconds. Without this line, uncollected coins accumulate forever.
Try this
Try this
Three short experiments. Predict before you run, then test your guess.
Change DROP_INTERVAL from 3 to 0.5. Predict what happens to: (a) the coin machine's visual density, (b) the player's earning rate, (c) the server's frame rate. Then run it for a minute. Which prediction was right, and which was off?
Comment out the Debris:AddItem(coin, COIN_LIFETIME) line. Press Play. Walk away from the coin machine. After 5 minutes, come back. How does the start area look? Even if it looks fine, why is the missing cleanup a bug waiting to happen in a multi-hour game session?
Right now the dropper just makes coins on the Start Platform. In Stage 5 you'll add a conveyor — a moving belt that slides each coin into a collector that pays the player automatically without pressing E. Looking at this script, which 2 lines will the conveyor script need to replace to take over coin movement?
Test your stage
- Press ▶ Play. Within 3 seconds, a gold coin appears under the dropper near the Start Platform.
- Walk near it. The Collect prompt appears. Press E. Counter goes up by 2.
- Wait. More coins spawn. Collect them.
- Walk away and let coins pile up. After ~30 seconds the oldest one disappears (Debris cleanup).
- Walk the hazard path. Touching a KillBrick respawns you at Stage 4 (yellow pad, NOT the Start Platform).
- Reach the Stage 5 violet pad. Counter goes up by 5 (Stage 5's per-pad payout).
- Design check. Stand still near the coin machine for 60 seconds. Did the dropper trickle feel rewarding, or boring? If boring, drop the INTERVAL to 2. If overwhelming, raise it to 5.
If it breaks
- No coin appears under the dropper. Most common cause: the dropper part isn't named exactly
Dropper. The script'sWaitForChild("Dropper")is case-sensitive. Re-check the part's Name in Properties. - Coin appears but pressing E does nothing. The script's
wirePickupis undefined or unreachable. Make sure thewirePickupfunction from Stage 3 is above this script's block in TycoonEconomy. - Coins spawn but they fall through the Start Platform. You forgot
coin.Anchored = true. Re-check that line. - Coin spawns inside the dropper, not below it. The CFrame offset is wrong. The line
CFrame.new(0, -2, 0)says "two studs down" — if you rotated the dropper, the offset rotates with it. Try increasing the -2 to -3 or -4. - Game freezes after a minute. You forgot the
task.spawnwrapping. Without it, thewhile true doblocks everything. The line should readtask.spawn(function()BEFORE thewhile true do. - Coins pile up forever even with
Debris:AddItem. Spelling — must be exactlyDebris(capital D) andAddItem(capital A and I). Lua is case-sensitive on service names. - KillBricks don't kill me. Each KillBrick needs a Script inside it. Did Ctrl+D copy the script too? Check Explorer — the Script should be indented under each KillBrick.
The conceptual leap this stage is Instance.new — campers create objects in code instead of by hand. Walk every camper through what Output shows when a coin spawns:
- Each
Instance.new("Part")creates ONE new part in memory. - It does nothing visible until
.Parent = workspace. - Once parented, it appears in the world AND in Explorer.
Have campers expand Workspace during Play. They'll watch DroppedCoin entries appear and disappear in real time. That's the most visceral demo of Instance.new — they're literally watching parts wink into existence.
- The most common Stage 4 failure: campers type the dropper code in the wrong Script (e.g., a Script inside the Dropper part, not in ServerScriptService). It often works, but feels wrong — the dropper part should be a target, not a script host. ServerScriptService is the script host.
- Some campers will be tempted to write
wait(3)instead oftask.wait(3). Both work for now, but Roblox is deprecatingwait()— encouragetask.wait()as the modern style. - The Debris service is invisible to campers (no visual feedback). The proof is "the start area doesn't get cluttered." If they're skeptical, have them comment out the Debris line and watch the part count climb in the Performance window (Studio → View → Stats).
- 50 minutes. KillBrick path takes 15 (familiar pattern), Stage 5 SpawnLocation takes 5, dropper part + script takes 30 (this is the heavy work).