Stage 3: Design the Board
Keep your Scratch project tab open all week. Open in a new tab so you don’t leave the course.
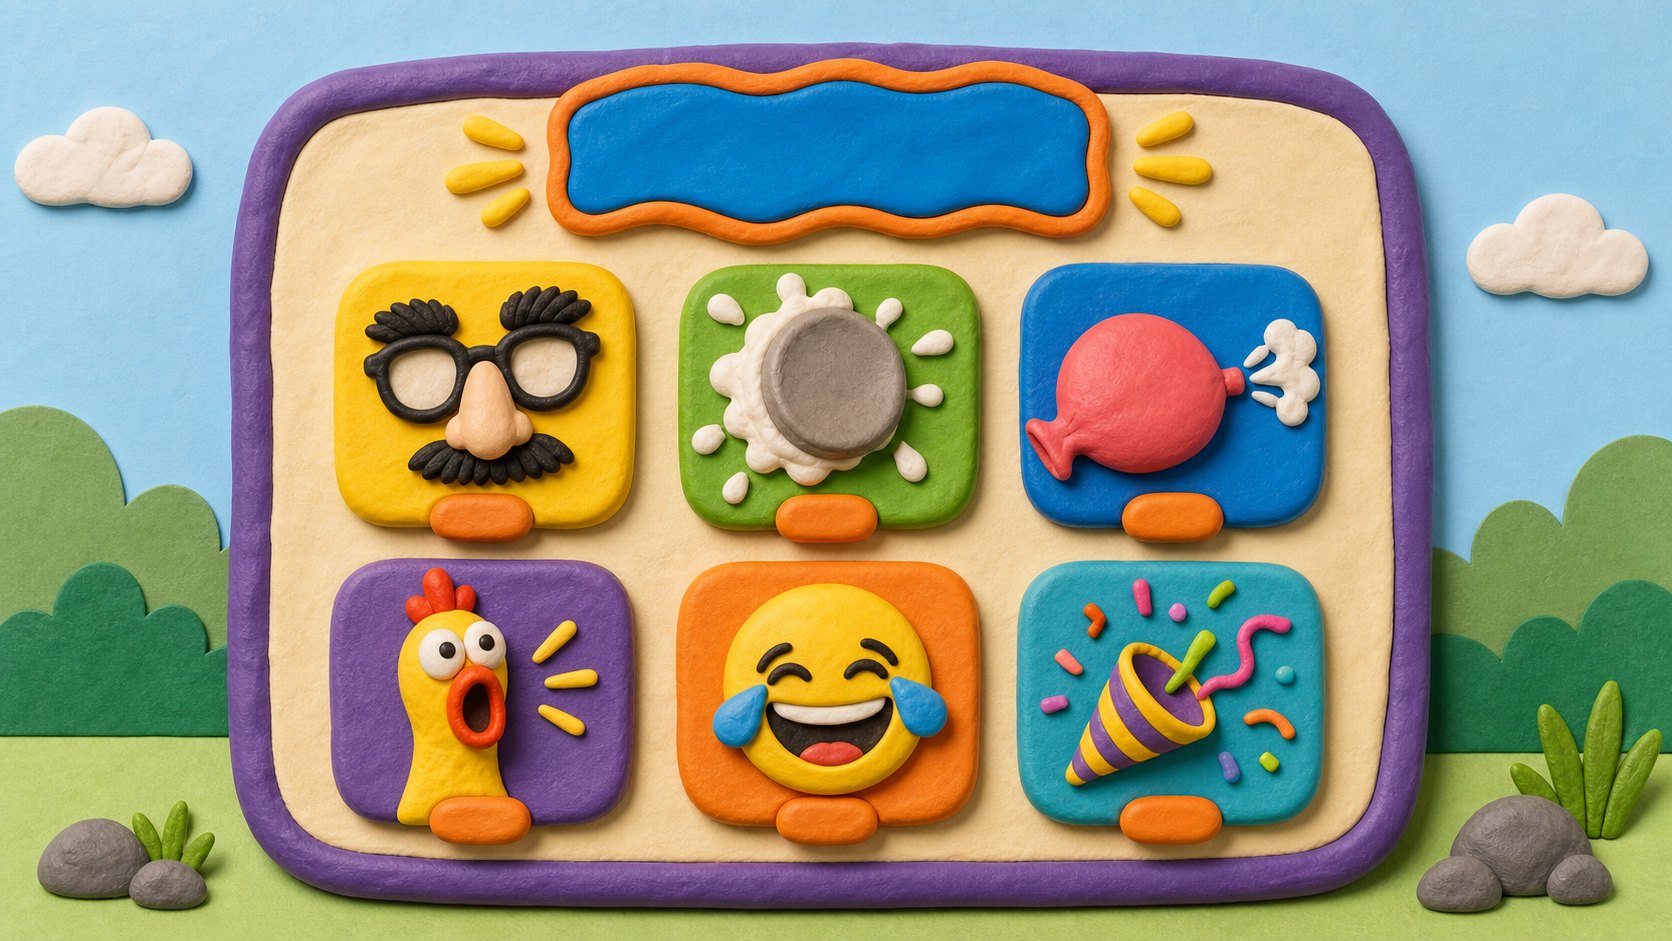
a full soundboard with buttons you drew, laid out in a neat grid
how to draw a costume and make buttons snap into place
App 1 finished — a real Meme Soundboard
Show the paint editor and the green-flag layout trick before campers dive in:
- Click a button sprite → Costumes tab. Use the fill bucket to color it, the circle tool to draw a shape, and the text tool to label it (BONK).
- Back on Code, add when green flag clicked → go to x: ( ) y: ( ) → set size to (60) %.
- Drag the sprite where you want it. Read its x and y off the stage and type those numbers into the go to block.
- Click the green flag. The button jumps to its spot. Do this for each button and you have a tidy grid.
Tell the room: the green flag is the "tidy up" button — it puts every piece back where it belongs.
The big idea
Your soundboard sounds great. Now let's make it look like a real app.
Two new ideas finish App 1:
First, drawing your own buttons. The Costumes tab has paint tools — a fill bucket, shapes, and a text tool. A costume is just the picture a sprite wears, and you can paint your own instead of using the cat. A red circle labeled BONK tells everyone what the button does before they even click it.
Second, laying out the board. Right now your buttons sit wherever you dropped them, and if you bump one, it stays bumped. We fix that with the when green flag clicked event plus two blocks: go to x: () y: () sends a sprite to an exact spot, and set size to () % makes it the right size. Now the green flag becomes a "tidy up" button — press it and every button snaps into its grid position.
A coordinate is just an address on the stage: x is left-right (–240 to 240) and y is up-down (–180 to 180). The middle is x:0, y:0.
- costume
- the picture a sprite wears; you can draw your own
- paint editor
- the drawing tools on the Costumes tab
- when green flag clicked
- an event that runs when the app starts
- coordinate
- an address on the stage — x is left-right, y is up-down
- go to x y
- a block that sends a sprite to an exact spot
Stage 2 should be done — you have at least two button sprites, each playing one of your own recordings.
Build it
Step 1 — Draw a button costume
Click your first button sprite, then click the Costumes tab.
You'll see its current costume (probably still the cat). Let's give it a button look:
- Use the fill bucket to flood the background with a color.
- Use the circle or rectangle tool to draw a clean button shape.
- Use the text tool (the T) to type a short label — the sound it plays, like BONK.
Don't overthink it. A colored shape with a word on it already reads as a button. You can delete the old cat costume by clicking the × on it, or just leave it — the app uses whichever costume is showing.
Step 2 — Repeat for every button
Do Step 1 for each of your button sprites. Give each one its own color and label so they're easy to tell apart. Aim for a soundboard of 4 to 6 buttons — duplicate more sprites (right-click → duplicate) and record more sounds if you want a fuller board.
Step 3 — Make a button snap to its spot
Pick one button. On the Code tab, add this above (separate from) its click script:
Tidy-up script (runs on green flag)
when green flag clicked
go to x: (-120) y: (60)
set size to (60) %
Now drag the button to exactly where you want it on the stage. Look at the x and y numbers that show under the stage as you move it. Type those numbers into your go to x: () y: () block.
Adjust set size to () until the button looks right — 60% is a good starting size for a grid of buttons.
Step 4 — Lay out the whole grid
Give every button its own when green flag clicked → go to → set size script, each with different x and y numbers so they form a tidy grid. For a 2×2 grid you might use:
- Top-left: x: -120, y: 60
- Top-right: x: 120, y: 60
- Bottom-left: x: -120, y: -60
- Bottom-right: x: 120, y: -60
Why the green flag lays things out
Without a go to on green flag, your buttons sit wherever they were last dragged — and if a button gets bumped mid-demo, it stays bumped. The when green flag clicked → go to x y script means every run starts from a clean, identical layout. Press the green flag and the whole board snaps to attention. This "reset to a known state on start" habit is one you'll use in every app this week.
Step 5 — Press the green flag and test
Click the green flag. Every button should jump to its grid spot at its set size.
Now click each button — they should still play their sounds. The layout script and the click script live on the same sprite without fighting; one runs on the flag, the other on a click.
Save your project. App 1 is done.
Understand it
A costume is separate from a sprite's behavior. Drawing a new costume changed how the button looks but not what it does — the click-to-play script still works exactly the same. Looks and logic are independent, which is why you could redesign all your buttons without touching a single code block.
The when green flag clicked → go to x y pattern is a real software idea called initializing: putting everything in a known starting position before anything else happens. Apps that don't initialize feel buggy — pieces end up in random places depending on what happened last time. Your green flag now guarantees the same clean board on every single run, on any iMac.
Good layout is design, not decoration. Buttons in a tidy grid with clear labels are buttons people can actually use. A pile of unlabeled shapes is a guessing game. You just did the same job a real app designer does: make it obvious what to press.
Try this
Try this
Three short experiments. Predict before you run, then test your guess.
Drag a button far away from its grid spot, then press the green flag. Predict what happens. Why doesn't it stay where you dragged it?
Set one button to set size to 40 % and another to set size to 90 %. Which size feels more clickable? Too small is hard to hit; too big crowds the others. Find the size that feels right for your board.
You just learned when green flag clicked to reset positions. In the next app — the Voice Changer — you'll use the green flag to reset something else at the start of each run. What do you think a voice changer might need to reset before you press a button?
Level up
Turn the board from working to memorable:
- Level 1 — Readable labels. Add one-word labels or obvious pictures to every button.
- Level 2 — Mood grid. Arrange the board so similar jokes sit together: loud sounds on one side, tiny sounds on the other.
- Level 3 — Signature button. Make one button look special and explain why it is the main joke of your board.
Meme board recipe
Before you call App 1 finished, check that the board has different kinds of jokes, not six copies of the same idea:
- Reaction button: a sound that answers something, like nope, wait what?, or a tiny gasp.
- Sound-effect button: a pure noise, like BONK, squeak, pop, or dramatic slide whistle.
- Character button: a voice that belongs to a silly character you invented.
- Combo button: two or three sounds that play in order for a tiny story.
Debug mission
Drag one button to a messy spot, then press the green flag. If it does not snap back, that button is missing its go to x: y: reset script. Fix it so every run starts from a clean layout.
Test your stage
- Each button has its own drawn costume with a color and a label.
- You have 4 to 6 buttons on the board (duplicate + record more if needed).
- Every button has a when green flag clicked → go to → set size script.
- Pressing the green flag snaps the whole board into a tidy grid.
- Every button still plays its sound when clicked.
- You can explain why layout reset matters before a demo.
- Your project is saved (File → Save Now).
- Design check. Show your board to the person next to you without explaining it. Can they tell which button does what just by looking? If not, your labels need work.
If it breaks
- My button still looks like a cat. The cat costume is still the one showing. Either draw over it or delete the cat costume with its ×, leaving your drawn one.
- The green flag doesn't move my button. Check that the script starts with when green flag clicked (gold) and not when this sprite clicked. They look similar but only the green-flag one runs on the flag.
- My button jumps to the wrong spot. The x and y numbers in go to don't match where you want it. Drag the sprite to the right spot, read the x/y under the stage, and copy those exact numbers into the block.
- All my buttons are in the same place. Each button needs different x and y numbers. If two share the same coordinates, they'll stack. Spread them out into a grid.
- My button got huge or tiny and won't click. Adjust set size to () — try 60%. Then press the green flag again to apply it.
This is the longest App-1 stage and it's mostly making, not coding — expect the room to go quiet and creative. Budget the back half for layout fiddling; kids will happily spend 20 minutes recoloring buttons. That's fine, but make sure everyone gets the green flag → go to layout script working before the day ends, because that "reset on start" habit carries into every later app.
Two common snags: (1) campers add when this sprite clicked by accident instead of when green flag clicked for the layout script — the two gold blocks look alike. (2) They forget to give each button different coordinates and everything stacks in one spot. Both are fast fixes once you know to look.
If a camper is way ahead, the title + backdrop medium stretch makes the demo look professional. The combo button hard stretch previews the "blocks run in order" idea that matters in App 3. Either is a good use of extra time.
This is a natural place to do a mini parent-demo rehearsal: have each kid click through their board and say one sentence about their favorite sound.